There are 4 types of Sewing Machine Feet for Free Motion Quilting that are most commonly referred to and used.
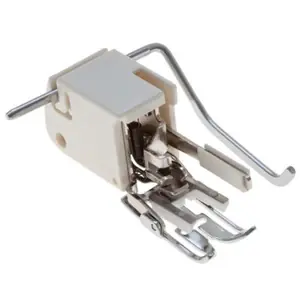
- Is a Walking Foot and whilst technically is not “Free Motion” it is an excellent tool for quilting and great for beginners to get the feel of sandwiching your quilt together
- Is a Closed Toed Free Motion Quilting Foot
- Is an open Toed Free Motion Quilting Foot, sometimes referred to as a “Darning Foot”
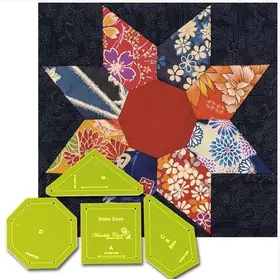
- Is a Free Motion Quilting Ruler Foot - specifically for using to guide around a "quilting ruler"
Walking Foot, Open Toed Quilting Foot, Closed Toe Quilting Foot, Free Motion Ruler Foot,

Sewing Machine Feet for Free Motion Quilting
There are 4 types of Sewing Machine Feet for Free Motion Quilting that are most commonly referred to and used.
- Is a Walking Foot and whilst technically is not “Free Motion” it is an excellent tool for quilting and great for beginners to get the feel of sandwiching your quilt together
- Is a Closed Toed Free Motion Quilting Foot
- Is an open Toed Free Motion Quilting Foot, sometimes referred to as a “Darning Foot”
- Is a Free Motion Quilting Ruler Foot - specifically for using to guide around a "quilting ruler"
 The Walking Foot is designed to move thick fabric or layers of fabric evenly. The feed dogs within the sewing bed only grip the bottom layer, and if you are using several layers you can often get puckering because the bottom layer will move through at the different pace to the top layers.
This foot is designed to move all layers at an even pace.
This foot whilst technically is not “Free Motion” it does allow for straight stitching, evenly and without puckering. If you are stitching in the ditch, echo stitching or wish to do a grid over your quilt this is an excellent option, especially for beginners, it will give you a feel for quilting and what is involved when working on larger, thicker projects, whilst still having the sewing machine actually feeding the quilt through.
A brilliant first step in quilting your projects yourself
I have seen many quilts that actually incorporate using a Walking foot and Free motion Quilting within the project, especially for stitch in the ditch or echo highlights.
If your Sewing Machine did not come with a Walking Foot, nearly machines do have them as an optional extra, and there are also many generic brands of Walking Foot on the market, just make sure you purchase one that is compatible with your brand of Sewing Machine.
** Special Note, the piece of metal that is attached to the back of the foot and sticks out the side, is a guide. When you are quilting your quilt actually covers the width guides on your sewing machine bed, and you have no way of actually keeping a consistent distance between your rows, unless you have marked your quilt. The flat bottom edge of the guide can be set to the distance you require between rows, and will sit level with your quilt, allowing you to set the guide on your last completed row of stitching. This easily allows even distance between your rows.
 The Closed Toe Free Motion Foot is specifically designed for Free Motion Quilting and will accommodate straight stitching only, if you tried to use a decorative stitch with this foot, the needle would strike the side of the foot breaking the needle.
If you have been quilting for awhile, and have the art of guiding your fabric at an even pace, this foot is perfect
However, if you are new to Free Motion quilting, and still a little “jerky” when moving the fabric, it can be problematic, and many a needle has been broken when learning with this foot.
It is also a lot harder to see a free motion design that you have marked on your quilt, because the fully enclosed area surrounding the needle. I always suggest that if you are just learning, or if you are following a design, the “Open Toed or “Darning” Foot is a much easier option. See Below for details.
 The Open Toed Free Motion Foot Can be used with both a straight stitch or a fancy stitch if required, although for Free Motion quilting, most people use a straight stitch. It comes in both metal as shown in the image or often with a clear plastic semi circle piece at the bottom.
This foot allows you to see a lot clearer where the needle is moving, and allows you to follow a pattern you have marked on your quilt a lot easier
When you first start to Free Motion Quilt, the difference in control is remarkable, you go from the machine feeding your fabric, to you having total control over the movement of the fabric layers. It can take some getting used to, getting a nice flowing curve to start with can be a challenge, but once you start, you will find each time you free motion, the better control you will have.
 The Quilting Ruler Foot is made specifically to guide around "quilting rulers" using the free motion action of your sewing machine. It is essential that you a ruler foot and a ruler produced for ruler quilting, or you will damage your sewing machine. If you have a "high shank" sewing machine, you must purchase rulers developed for "high shank machines", If your machine is "low shank" you may use rulers made for both "high and low shank".
Some things beginners have trouble with
- Getting the stitching to flow through a gentle curve
The easiest way to get used to moving the machine in a curve, is to slow the speed of your machine down so you have more control over the movement. If your machine does not have speed control, one thing that many women do is to turn the foot pedal upside down. It will run a lot slower for you because it is harder to press.
- Stitching in the Ditch and Echo Stitching
When you first start to free motion, keeping the foot steady enough to follow a seam line, or a set distance from the seam in a perfectly straight line can be a massive challenge, it takes time to actually get that type of control over the needle and fabric flow. If you are finding this to be an issue for you, use your Walking foot to start with, but continue to practice with your free motion foot.
- Following a design or using a design already printed on fabric
It is much harder to follow a design that is incorporated into a printed pattern, you stitching must be precise or it is really noticeable, until you get used to guiding the fabric, mark your own design and follow that, because if it is not perfect, no-one will ever know
We will be covering different ways to mark your quilt in a later post in this series.
- Designing your own pattern as you sew
Many do not find this a problem especially if they are artistic, but many many of us just cannot get it right, or we are not happy with the results. Again it is practice, and it does come to most people, and if it doesn’t it does not matter, there are lots and lots of ways of marking a design on your quilt top, and when the quilt is finished, no-one will ever know.


